Seed Starting Equipment
Your garden season starts here. Set yourself up for success.
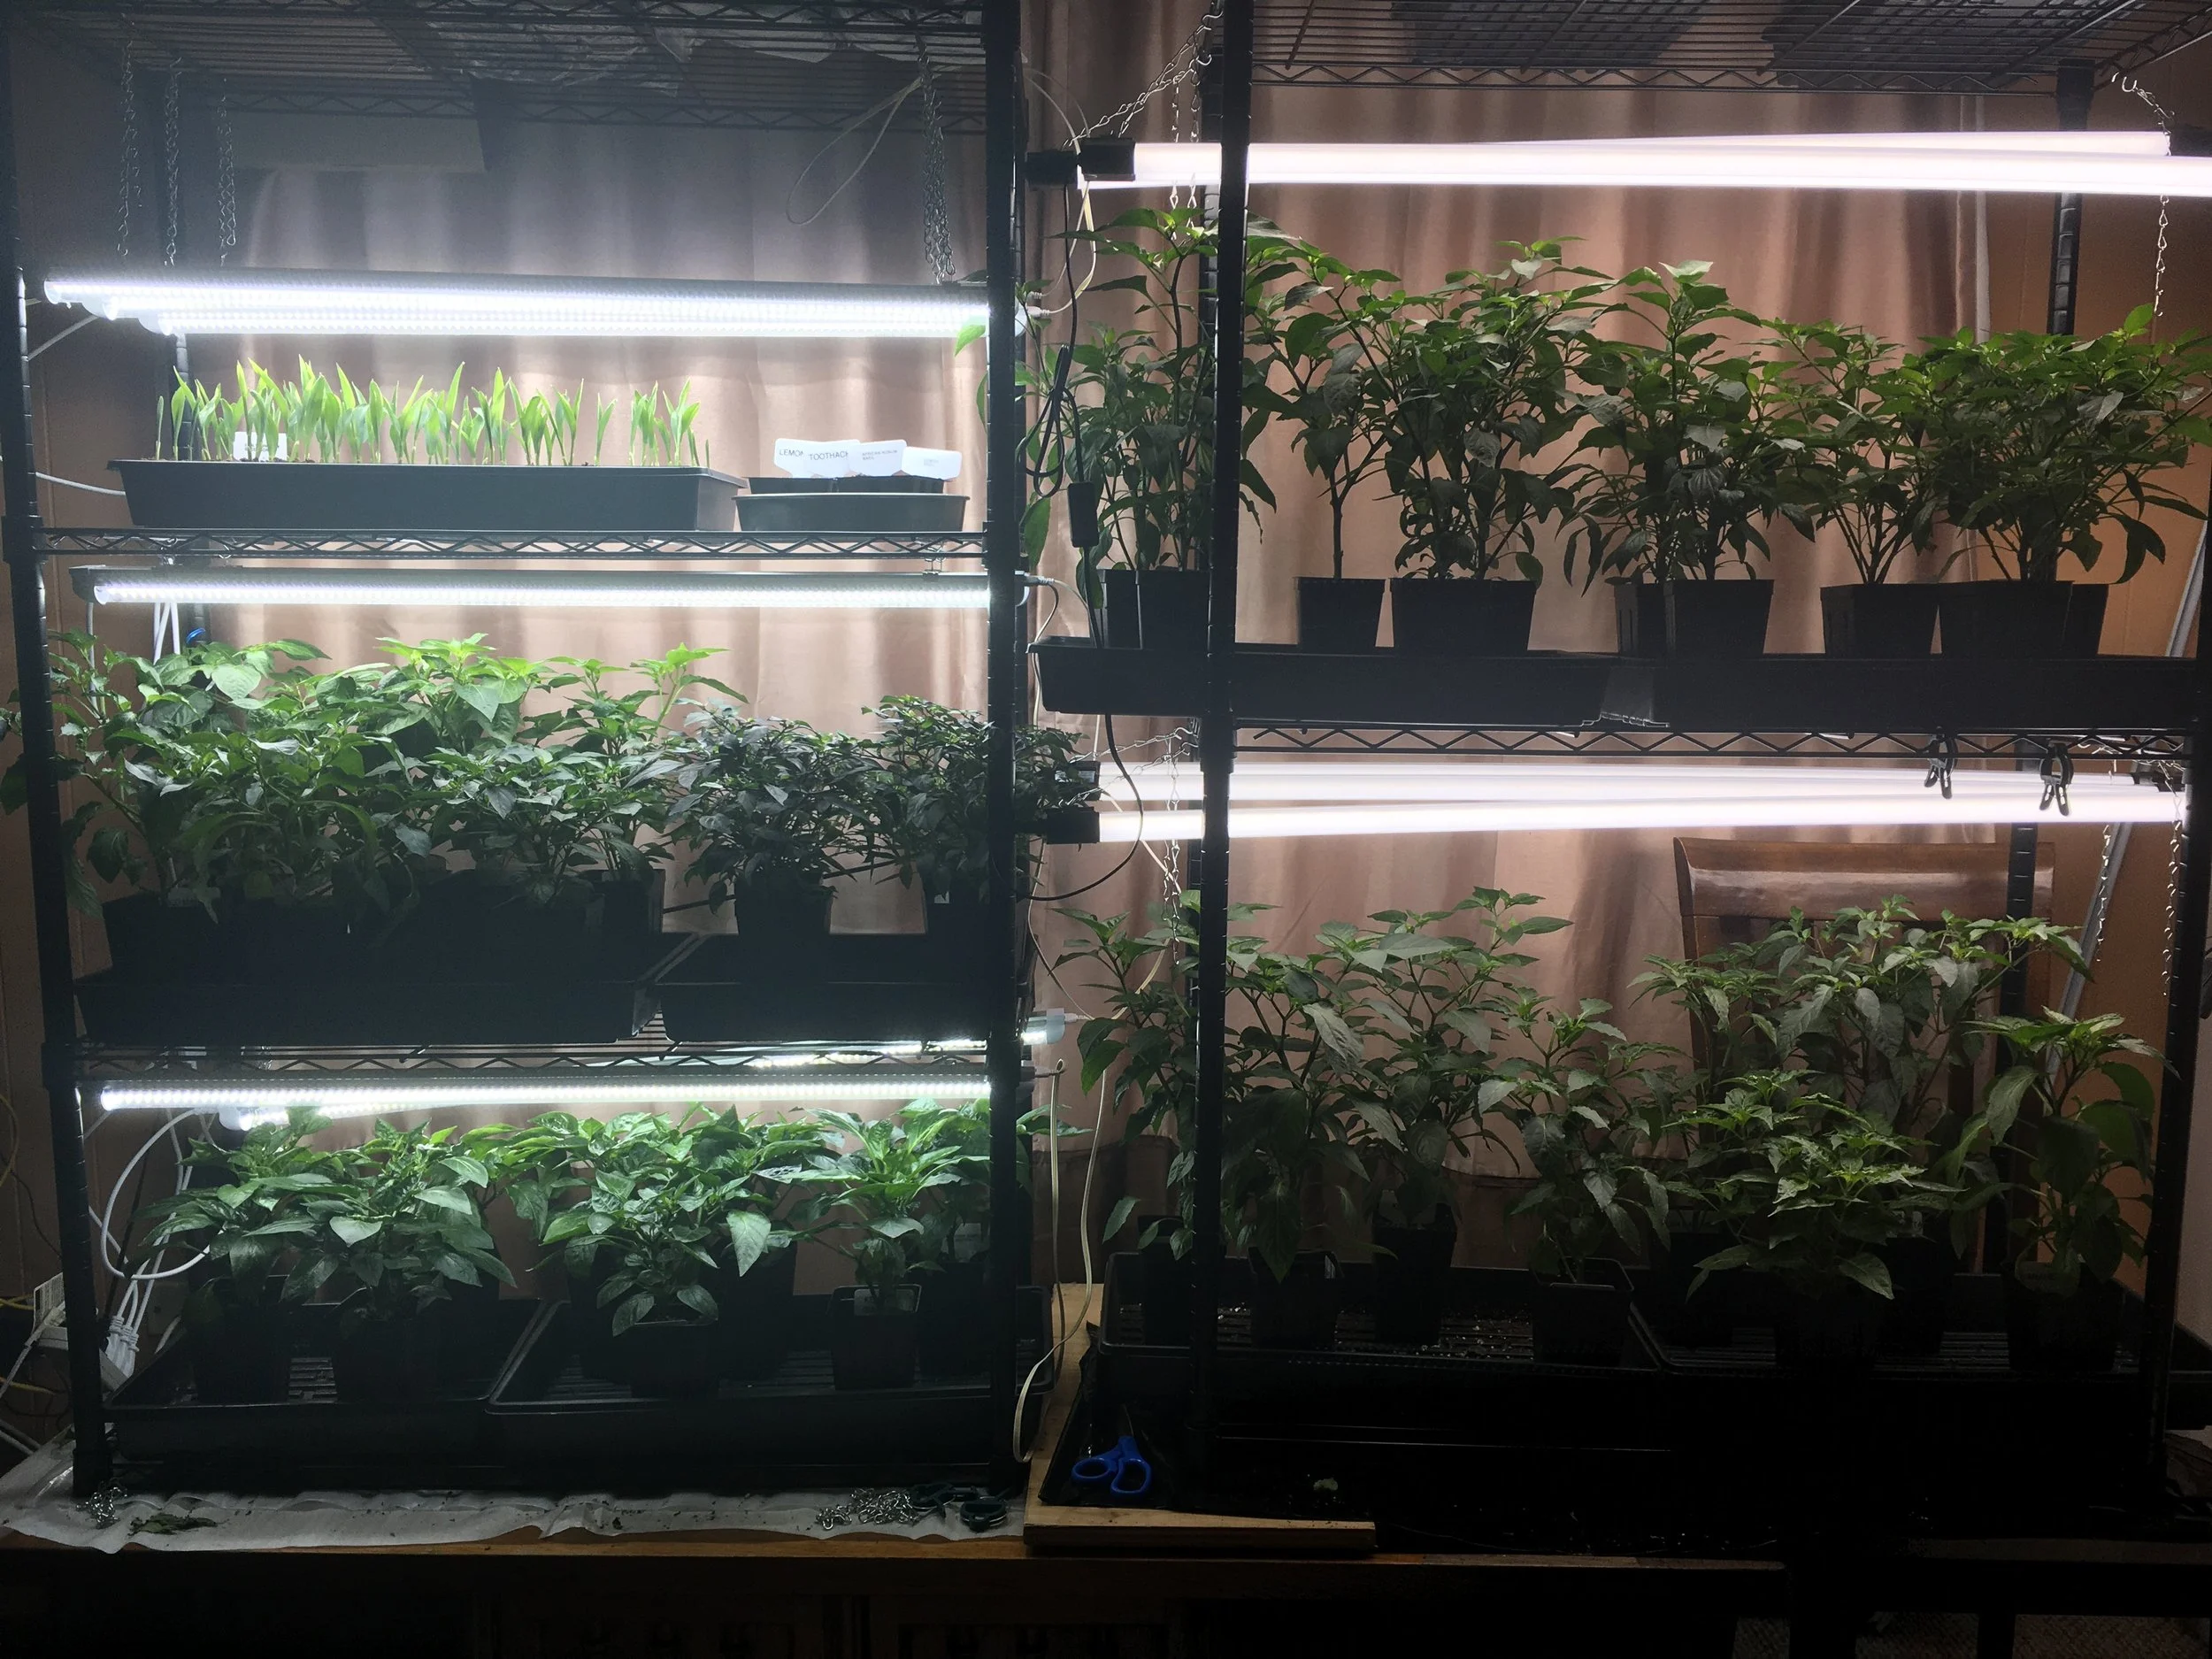
Our seed starting setup
A note about the links on this page:
These links go to our Amazon Affiliate page. If you make a purchase, we get a small commission, at no extra cost to you. This helps us continue to create gardening resources for you, and offer them for free. You absolutely do not have to use the same products we use. We are sharing them because we have been successful with them, and get many questions on them. All the seed starting equipment is here in one place.
Do you need to start seeds indoors?
Short answer, of course not! You are just as much a gardener whether you buy started plants, or start your own. However, starting your own seeds indoors can be cost effective, and also a fun challenge. Many gardeners enjoy the whole process, because depending on your area it usually begins in January or February, and can be a cure for the winter blues as we wait (not so) patiently for spring. If you’re a “planner,” you would probably enjoy the process.
Below we detailed what we use in our seed starting setup indoors. While it’s true that the cost of this setup can add up quick, it is also important to note that this is an investment in your garden, and can even save you money. For example, if we wanted to start enough plants for a few raised beds, this investment might not be worth it. But, we start 50+ tomato plants alone. We could almost purchase our whole setup for the same amount we would spend on tomatoes plants for just one year. We also start plants for family member’s gardens, and start seeds for rare and heirloom plants you cannot find in garden centers. Although investing in this setup will definitely pay for itself over time, it is important to still work within your budget.
Shelving
We have our grow shelves set up in Holly’s office, so with the space we have, we use two shelves that are three feet wide each. Each shelf is 12 inches deep, so a standard 10”x20” tray fits nicely. If you plan to start many trays, and have the space, you may want to consider a 24” deep shelf.
Lights
The two most important things to think about when selecting lights, are the kelvin and lumens. You want to mimic daylight conditions, so your seedlings will be happy. And you can do that with shop lights. You don’t even need “grow lights.” If you plan to grow indoors, especially fruiting plants, you should probably get grow lights. But if your purpose is to start seeds and keep seedlings healthy until transplant, then you do not need to shell out the big bucks for grow lights.
Kelvin (K) describes the hue, or color, of the light. Sunlight is 5250K, and our favorite lights are 6000K.
Lumens (lm) indicate the brightness of the bulbs. More lumens equals more light. Our favorite lights are 4680lm.
Watts measure energy use. The lower the watts, the lower the electric costs.
Some other things to consider is how many lights you’ll need for your setup, and what configuration you’ll use. We mostly use two lights per shelf in our setup. We purchased a set of eight, that came with enough cords and switches to set them up shelf-by-shelf. Specifically, for each shelf, we chain two lights together, and add a switch. That way, they’re not all on the same plug or switch, so if we’re not using a shelf, we switch the lights for that shelf off, and save some electricity.
Our favorite lights come in an eight pack. They’re 6000K, 4680lm, 36W.
We have also tried a second set, but we do not like it as much. In the photo at the top of this page, you can see them on the shelf on the right. They’re 5000K, 4400lm, 42W. So they’re less efficient, while also being less bright, which is why we do not necessarily recommend them.
Heat Mat
Heat mats are useful for starting warm season crops like tomatoes, peppers, and eggplant. These seeds need a particular temperature for germination, and if your room is cooler than that temperature, then the seeds will not germinate. In our experience, even if your room is the correct temperature, then the heating mat will still speed up germination.
Some heat mats come with temperature gauges; however, we have found the temperature gauge is not necessary. We use a cheap, basic heat mat.
Fan
A fan is crucial for plant development. Do not skip this. The fan will circulate air, and mimic wind, making the seedling plant stems stronger. This makes a huge difference once you transplant your seedlings into the garden. We use two fans on a low setting to circulate the air in our grow room.
Timer
While a timer is not specifically required, it helps us a ton! For less than a $10 investment in a timer, you can eliminate the possibility you might forget to turn your grow lights on or off, or that you may not be home when it is time to turn them on or off. Seedlings need light that mimics daylight, so we set our timer to cut on at daylight, and cut off 12 hours later.
Power Strip
Be prepared to plug everything in. We like this surge protector, because it has a flat plug that does not stick out from the wall.
Seed Starting Mix
Seed starting mis is the soil used for seed starting. We have a separate blog post all about seed starting mix + how to make your own.
The mix we prefer to use indoors is Miracle Grow Indoor Seed Starting Mix, primarily because it has fertilizers in it, and we prefer not to have to fertilize our seedlings.
We have also used and like Espoma Organic Seed Starting Mix.
Trays, Cells, Pots, and Domes
This is an area where you can go cheap, or make a bigger investment. You can start seeds in solo cups or yogurt containers if you want to, or invest in something long-term. Quality of plant trays and cells vary greatly, and you get what you pay for. We started cheap, and are now investing in higher quality replacements as the cheap ones break.
We use standard 1020 (10” by 20”) bottom trays with no holes indoors most of the time (if seed starting outdoors, you want bottom trays with holes or a basket that fits inside one, so the rain can drain through). We also use 1014 trays occasionally.
We use a 72-cell insert (made up of 12 6-cell inserts) for almost everything.
We use a 128-cell insert for things like lettuce, kale, and chard, mainly because these plants don’t need bigger cells.
We use 2.5” cells for things like squash. A full 1020 tray will hold 32 of these cells.
We put up tomatoes and peppers into deep 3.5” cells.
We do have some domes we use when we want to increase humidity over a tray, but we live in a fairly humid climate, and don’t find it necessary to always use domes.
Plant Tags
Always tag your seeds! If you think you’ll remember what you planted where, you won’t! Just tag them. Seriously.
Holly insists I tag everything in the garden so she knows what I planted where. I use the tags below, and label with with a P-Touch labeler. The tags do not fade. I have used the same tags for several seasons. Only a few have ever broken.
We have used permanent marker on plant tags before, and the marker fades in the sun. We have used popsicle sticks, and they just break down. I have read of people cutting and using old mini blinds or milk jugs, and writing on them with pencil, but have not tried it.
For seedlings we start for family members, we use these tags, color coded by person.
And that’s it. That’s what we use to start seeds. Let us know if you have any questions! Happy Gardening!


